Guardian Alarm System Manual: A Comprehensive Guide
This manual details installation, operation, and maintenance for Guardian III and Concord 4 systems, covering components like control boards, sensors, and remote alarms.
Guardian Alarm Systems are designed to provide robust and reliable security for residential and commercial properties. This manual serves as a comprehensive guide for owners and installers of the Guardian III and Concord 4 systems. Understanding the core functionalities and components is crucial for effective system operation and maintenance.
These systems utilize advanced technology, including temperature-activated sensors and remote alarm capabilities, to detect and respond to potential threats. Proper installation, as outlined in this manual, ensures optimal performance. Familiarize yourself with system indicators, troubleshooting procedures, and basic programming options to maximize your security investment. This guide will empower you to confidently manage and maintain your Guardian alarm system.
Understanding the Guardian III System Components
The Guardian III system comprises several key components working in unison to deliver comprehensive security. These include the System Enclosure/Extinguisher Assembly, providing a protective housing and potential fire suppression. The Central Processing Unit Control Board is the system’s brain, managing all functions and sensor inputs.
Powering the system is the AC/DC Adaptor, ensuring continuous operation even during power outages. Additional components, like the Temperature Activated Sensor Assembly and Distribution Assembly, detect environmental changes. Remote Alarms extend system coverage, while the Manual Remote Pull Station (K5309-5GP) allows for immediate alarm activation. Understanding each component’s role is vital for effective installation and troubleshooting.
System Enclosure/Extinguisher Assembly
The System Enclosure/Extinguisher Assembly serves a dual purpose within the Guardian III system. Primarily, it provides a robust, protective housing for sensitive electronic components, shielding them from physical damage and environmental factors. This enclosure is designed for durability and tamper resistance, ensuring the system’s integrity.
Secondly, depending on the specific configuration, the assembly may incorporate an extinguishing component, offering a first line of defense against fire. This feature is crucial in environments where rapid fire suppression is paramount. Proper installation and maintenance of this assembly are essential for optimal system performance and longevity, safeguarding both the electronics and the protected area.
Central Processing Unit Control Board
The Central Processing Unit (CPU) Control Board is the brain of the Guardian III system, responsible for managing all system functions. This board receives signals from various sensors – temperature, remote alarms, and others – and processes them according to programmed parameters. It controls the activation of alarms, communicates with monitoring services, and manages system diagnostics.

Key features include zone monitoring, alarm memory storage, and the ability to interface with peripheral devices. Proper functionality of the CPU Control Board is critical for reliable system operation. Regular inspection and adherence to maintenance guidelines are essential to ensure accurate signal processing and timely alarm responses, protecting property and life.
AC/DC Adaptor – Powering Your System
The AC/DC Adaptor is a vital component, converting standard alternating current (AC) power into the direct current (DC) required to operate the Guardian III system. This adaptor ensures a consistent and reliable power supply to the Central Processing Unit Control Board and connected sensors. It’s designed to maintain optimal voltage levels, safeguarding against power fluctuations that could compromise system performance.

Proper installation and a stable power source are crucial. The adaptor typically features a backup battery system, providing continued operation during power outages. Regularly check the adaptor’s connections and the battery’s charge level to guarantee uninterrupted security. A faulty adaptor can lead to system failure, so prompt replacement is recommended.
Guardian Concord 4 System Overview
The Guardian Concord 4 represents an advanced security solution, offering a comprehensive suite of features for both residential and commercial applications. This system builds upon the foundation of previous Guardian models, incorporating enhanced reliability and user-friendly operation. It’s designed for scalability, allowing for the addition of numerous sensors and peripherals to customize protection.
Key features include flexible zoning capabilities, remote access options, and detailed event logging. The Concord 4 utilizes a sophisticated control panel for managing system settings and monitoring status. Users can easily arm and disarm the system, bypass zones, and review alarm history. Access to a quick reference manual, available online, simplifies operation and troubleshooting.

System Operation: Basic Functions
Operating your Guardian alarm system is straightforward, with primary functions revolving around arming and disarming. The system offers at least two arming modes: ‘Away’ and ‘Stay’. ‘Away’ mode activates full perimeter protection, ideal when leaving the premises unoccupied. ‘Stay’ mode secures the perimeter while allowing movement within the protected space – useful for nighttime security.
Arming is typically achieved via a keypad, entering a user-defined code. Successful arming is indicated by system lights (Armed and Ready). Disarming follows a similar process. Understanding these basic functions is crucial for daily use. Refer to the quick reference guide for specific code entry procedures and system indicators.
Arming the System (Away Mode)
To arm the Guardian system in ‘Away’ mode, ensure all doors and windows are securely closed. Access the keypad and enter your designated user code. The system will initiate a countdown, typically indicated by an audible beep, allowing time to exit the premises. During this countdown, any zone breach will halt the process and trigger an alarm.
Once the countdown completes, the system will fully arm, displaying the ‘Armed’ indicator light. This mode activates all sensors, providing comprehensive protection while you are away. Remember to verify the ‘Ready’ light illuminates before exiting, confirming all zones are secure. Failure to do so may result in a false alarm.
Arming the System (Stay Mode)
Activating ‘Stay’ mode provides perimeter protection while allowing movement within the secured premises. Begin by ensuring all exterior doors and windows are closed and secure. Enter your user code on the keypad. Unlike ‘Away’ mode, ‘Stay’ mode often requires a specific key press or sequence to differentiate it from full arming.
The system will initiate a countdown, similar to ‘Away’ mode, providing an opportunity to correct any accidental zone breaches. Upon completion of the countdown, the ‘Armed’ and potentially a ‘Stay’ indicator light will illuminate. Interior sensors are typically bypassed in this mode, preventing false alarms from pets or routine movement. Always confirm the system is ‘Ready’ before relying on this protection.
Understanding System Indicators & Lights
Guardian alarm systems utilize a series of lights to communicate system status. The ‘Armed’ light illuminates when the system is successfully armed, either in ‘Away’ or ‘Stay’ mode. The ‘Ready’ light indicates that all zones are secure and the system is prepared for arming. These lights provide immediate visual confirmation of the system’s operational state.
However, red light signals require careful attention. A rapidly flashing red light signifies that an alarm event has occurred, and the system retains a memory of this event. Consult your installer for specific interpretations of lit red lights, as meanings can vary. Understanding these indicators is crucial for effective system monitoring and response.
The ‘Armed’ and ‘Ready’ Lights
The ‘Armed’ light on your Guardian system provides clear confirmation that the security system is actively protecting your property. This light illuminates consistently once the system is successfully armed, whether in ‘Away’ mode for full perimeter protection or ‘Stay’ mode for internal security while occupants are present;
Simultaneously, the ‘Ready’ light indicates that all protected zones are secure and the system is prepared for arming. Both lights being illuminated signify optimal system readiness. If the ‘Ready’ light is off, investigate and secure any open zones before attempting to arm the system, ensuring comprehensive protection.
Interpreting Red Light Signals (Rapid Flashing)
A rapidly flashing red light on your Guardian alarm system is a critical indicator, signaling that an alarm event has occurred and is stored in the system’s memory. This doesn’t necessarily mean an active intrusion is in progress, but demands immediate attention. The rapid flash signifies the system has detected a breach – potentially a door or window opening, motion detection, or other triggered sensor.

Consult your installer to understand the specific meaning of the red light, as interpretations can vary. Accessing the alarm memory will reveal the zone and time of the event, allowing you to investigate and determine the cause. Do not dismiss this signal; it requires prompt investigation.
Troubleshooting Common Issues
Addressing common problems proactively ensures your Guardian system’s reliability. False alarms are a frequent concern; ensure all doors and windows are securely closed before arming. Verify sensor placement avoids triggering sources like pets or moving curtains. Low battery indicators signal the need for immediate replacement – a failing battery compromises system security.
If the system fails to arm, check for open zones or communication errors. Refer to the system indicators for clues. Regularly testing the system (see testing procedures) identifies potential issues before they become critical. If problems persist, consult the system programming section or contact qualified support.
False Alarm Prevention
Minimizing false alarms is crucial for maintaining system credibility and avoiding unnecessary responses. Thoroughly inspect all protected openings – doors and windows – ensuring they are completely closed and locked before activating the system. Pay close attention to sensor placement; avoid areas prone to drafts, direct sunlight, or movement from pets or foliage.
Educate all users on proper arming and disarming procedures. A rapid flashing red light indicates a recent alarm event; investigate the cause promptly. Regularly test the system to verify sensor functionality and identify potential issues. Proper maintenance and awareness significantly reduce the likelihood of false alarms.
Low Battery Indicators & Replacement
The Guardian system utilizes battery backup to ensure continued operation during power outages. A low battery condition will be indicated by specific system alerts – consult the system indicators section for details. Prompt battery replacement is essential to maintain security. Use only manufacturer-approved replacement batteries to guarantee compatibility and optimal performance.
Before replacing, disconnect the system from AC power. Carefully follow the instructions in the system documentation for accessing and replacing the battery. Properly dispose of old batteries according to local regulations. Regularly testing the system confirms battery functionality and provides peace of mind. Ignoring low battery warnings compromises system reliability.
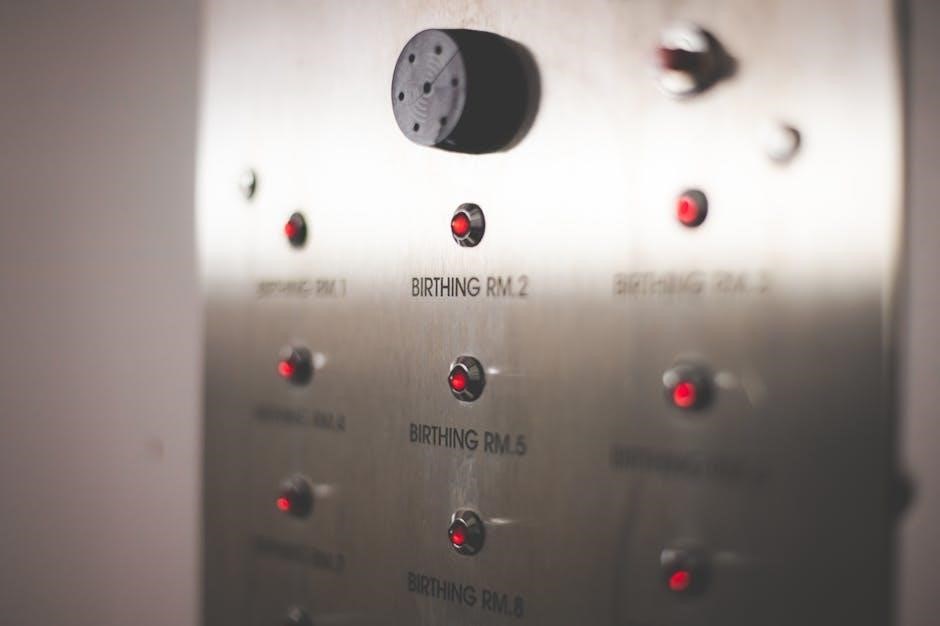
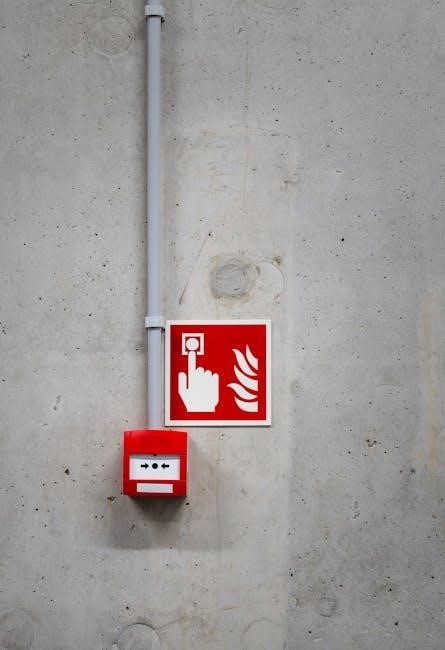
Remote Alarm Functionality
Guardian systems offer enhanced security through the addition of remote alarm capabilities. These devices extend the system’s protection to outbuildings, garages, or other vulnerable areas. Remote alarms connect to the central control panel, transmitting alarm signals upon activation. Proper installation is crucial for reliable operation; refer to Figure 5 & 6 for guidance.
When installing, ensure adequate wiring and secure mounting. Test the remote alarm functionality after installation to verify communication with the control panel. Remote alarms should be strategically placed for maximum effectiveness. Consider environmental factors that might affect performance. Regularly inspect remote alarms for damage or tampering, maintaining a robust security perimeter.
Installation of Remote Alarms
Proper installation of remote alarms is vital for extending your Guardian system’s protective reach. Begin by selecting a suitable location, considering accessibility and potential threats. Refer to Figure 6 for a visual guide. Ensure the wiring connecting the remote alarm to the central control panel is secure and protected from damage or interference.
Mount the remote alarm firmly, using appropriate hardware for the surface. Test the connection after installation, triggering the alarm to confirm communication with the main control unit. Verify the signal is received and registered by the system. Regularly inspect wiring and mounting to ensure continued functionality and prevent false alarms or system failures.
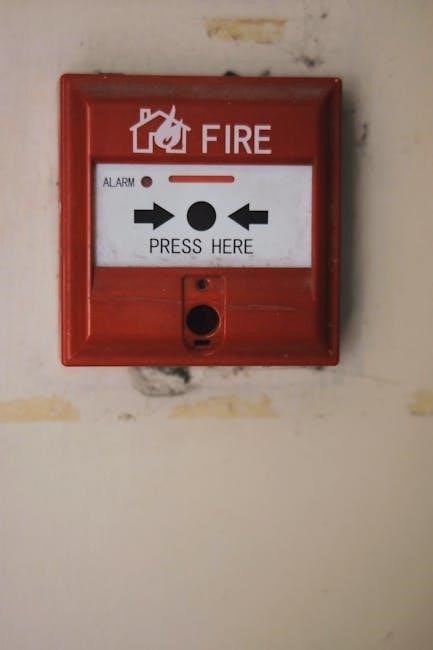
Manual Remote Pull Station (K5309-5GP)
The K5309-5GP Manual Remote Pull Station provides a readily accessible method for initiating an alarm, particularly useful in emergency situations where immediate action is required. This station allows for manual activation, bypassing the need for sensors to detect a threat. Figure 7 illustrates the station’s design and operation.
To activate, firmly pull down on the handle. This action immediately sends a signal to the central control panel, triggering the alarm sequence. Ensure all personnel are familiar with the location and operation of the pull station. Regular testing is recommended to verify functionality. Following activation, the station requires resetting by authorized personnel to restore normal system operation.
Bypass Functionality – Excluding Zones
The Guardian system offers a bypass feature, enabling temporary exclusion of specific zones from alarm monitoring. This is useful when a sensor is malfunctioning, a window is left open, or during routine maintenance. Utilizing the bypass function prevents false alarms from compromised zones while maintaining overall system security.
Access the bypass function through the control panel interface. Select the zone(s) to be bypassed, typically indicated by a dedicated ‘BYPASS’ button (see Figure 2). A visual indicator confirms the bypassed status. Remember to re-enable bypassed zones once the issue is resolved to ensure comprehensive protection. Improper use can compromise security, so exercise caution and document all bypass actions.
Chime Mode – Audible Notifications
The Guardian alarm system incorporates a ‘Chime’ mode, providing audible notifications for specific zone activity without triggering a full alarm. This feature is ideal for monitoring entry doors during business hours or when expecting visitors, offering a discreet alert. Activation is typically achieved via a dedicated ‘CHIME’ button on the control panel (refer to Figure 2).
When armed in Stay mode, zones programmed for chime will emit a single audible tone upon activation – a door opening, for example. This allows you to identify the source of the activity without a full alarm response. Remember to consult your installer for proper zone programming for chime functionality. Ensure the chime volume is appropriately set for clear audibility.
System Testing Procedures
Regular system testing is crucial to ensure the Guardian alarm system functions correctly. Initiate a test by pressing the ‘TEST’ button on the control panel (see Figure 2). This activates a walk-test sequence, prompting each zone to report its status. Observe the control panel for proper zone indication – a lit or flashing light confirms communication.
Verify that all door and window sensors trigger the appropriate response during the test. Also, test the remote alarms (Figure 5 & 6) and the manual pull station (K5309-5GP, Figure 7); A successful test confirms the system’s ability to detect and report intrusions. Document test results and address any failures immediately by contacting your installer.
Alarm Memory – Reviewing Past Events
The Guardian system retains a memory of alarm events, even after they’ve been cleared. A rapidly flashing red light (see Interpreting Red Light Signals) indicates an alarm event is stored in memory. To review these events, consult your installer, as accessing the alarm history typically requires specialized programming knowledge and tools;
The system logs the date and time of each alarm, along with the zone that triggered it. This information is invaluable for identifying patterns or potential vulnerabilities. Regularly reviewing alarm memory helps maintain system effectiveness and provides crucial data for security investigations. Remember to document all reviewed events for future reference.

Maintenance and Care
Regular maintenance ensures optimal performance of your Guardian alarm system. Periodically inspect all system components – the enclosure, control board, and sensors – for any signs of damage or tampering. Ensure the AC/DC adaptor is securely connected and free from obstructions;
Pay close attention to battery levels, as indicated by low battery warnings (see Low Battery Indicators & Replacement). Replace batteries promptly to avoid system failures. Dust the enclosure and sensors gently with a soft cloth. Avoid using harsh chemicals or abrasive cleaners. Professional inspection annually is recommended to verify system integrity and functionality.
Guardian System Programming (Basic)
Basic programming of your Guardian system should be performed by a qualified installer, as incorrect settings can compromise security. However, understanding fundamental options is helpful. Zone programming allows customization of sensor types and alarm responses. User codes can be added, deleted, or modified to control system access.
The system allows for adjustments to entry/exit delays, chime volume, and bypass settings. Refer to the full programming manual for detailed instructions and advanced features. Always document any changes made to the system configuration. Incorrect programming can lead to false alarms or system malfunctions; professional assistance is strongly advised for complex modifications.
Contacting Support & Resources
For immediate assistance with your Guardian alarm system, contact your local authorized dealer or installer. They possess specialized knowledge of your system’s configuration and can provide prompt support. Additional resources, including frequently asked questions and troubleshooting guides, may be available online through the Guardian website or affiliated security forums.
Keep your system’s model number and installation date readily available when contacting support. This information will expedite the assistance process. For complex issues or warranty claims, refer to the original purchase documentation. Remember to consult the full manual for detailed information before seeking external help.


0 Comments